image of Shaw Website Design Group's Opening Header image of Shaw learning resource bubbles Image of Shaw Web Development Header Image of Shaw Content Management System - CMS HeaderImage of Shaw’s Application Development Services Image of Shaw’s Extensive Graphic Design Services Image of Shaw’s Mobile Application and Web Design header image Image of Shaw’s SEO and Directory Marketing Services header image Image of Shaw’s Social media - search engine marketing header image

Jimdo Images will love Google+

     Welcome to Shaw Website Design Group's Jimdo Tutorial Bubble. By the time you're finished you will know how to use Google+ to store and share the images you use on your Jimdo website. On this journey you will learn the power of schema and proper image markup that will help with search engine exposure. The tutorials themselves provide a slow paced walk-thru that combines text, video and graphic images.


     If you are not using Jimdo at this time, take heart in the fact that many parts of this extensive tutorial can be easily used on other CMS or barebone HTML website development platforms.

Tutorial specially designed for Jimdo users
Shaw's Jimdo Tutorial Bubble focusing on Google's love for your Jimdo Images

   This Jimdo Tutorial strives to teach you the following over many phases:


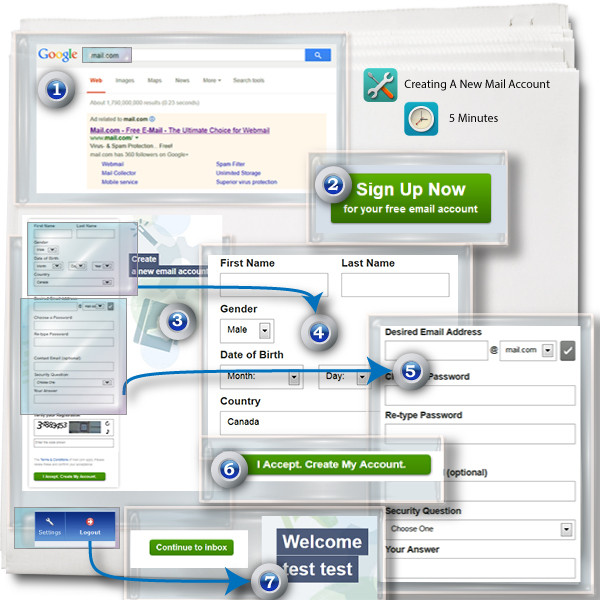
  • Creating a Mail.com Account
  • Create a Google+ account
  • Set up your Gmail
  • Set up your Google+ profile page
  • Set up your Google+ album page
  • Download Picasa 3
  • Create and sync your Picasa folder with your google+ page
  • Properly Size your images for Jimdo web pages.
  • Build Meta tags for your photos.
  • Upload images to Google+ thru Picasa.
  • Build Schema image templates for your Jimdo webpage.
  • And finally.. Placing images onto your Jimdo page and formatting them for Google crawlers.

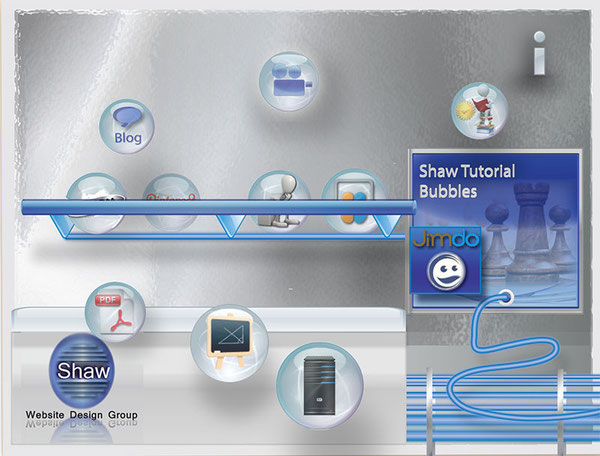
   All tutorials will be broken into Projects with each Project having numerous Phases.


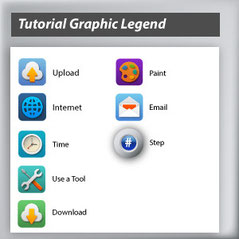
Each Phase will provide:


  • An expandable, illustrated image representing a visual chronology of events
  • A deeper descriptive point-by-point walk-through of events.
  • And a Video that covers the chronological steps in real time.


Shaw Website Design Group Shaw Tutorial Bubbles

Jimdo images love Google+

Project One | Edu : Programming | Location : Calgary

Publisher : Shaw Website Design Group | Genre : Tutorial | Date : 2013-12-12

url :

Project One focuses on creating a generic mail.com account


Tags : mail.com,Jimdo tutorial,create email,generic email,mail.com video tutorial,creating a mail.com account, Shaw tutorial series,shaw tutorial bubbles

Written by


Project Two completion ETA : Jan 2014

Let us begin our journey......

Project One : Creating a Generic Email Account

Phase One : Accessing Mail.com and creating an account.

     First of all, we assume that you currently do not have a Gmail Account so our first order of business is to create a generic email account that allows Google+ to send email communications to us.  If you want to use your existing email account to communicate with Google+ simply skip to Project Two.

First Phase: Accessing Mail.com and creating an account.
Accessing Mail.com and creating an account.

Need to see the Illustration legend?

Step one in Accessing Mail.com and creating an account.
Step One

   Open up your Internet browser window and search for 'mail.com' using either a search engine you currently use or you can access Google's search engine. Enter in 'mail.com' into the search query, press return, and you should be provided with Mail.com's information. Select Google's hyperlink to Mail.com to access their website.

Step two in Accessing Mail.com and creating an account.
Step Two

   Upon entering Mail.com select the green 'sign up now button'. This will direct you to mail.com's sign up page. If you do not see the green 'sign up now' button don't panic. The search engine has just directed you to Mail.com's news and events page. Select the 'email' option in the main menu, which is located at the top left of the page just below Mail.com's main logo.

Step three in Accessing Mail.com and creating an account.
Step Three

   You are now at the sign-up page where you will need to provide basic information to create the email account. You will need to think up a email address and a domain name, provide a password you can remember, select a security question from a drop down list and finally verify that you are human by entering in a displayed registration code.

Step four in Accessing Mail.com and creating an account.
Step Four

   The first part is simple. Provide a first and last name you want to use, gender, date of birth and country you reside. Please note that you will not be forwarding any mail to your existing email accounts due to the fact that Mail.com does not know your other email addresses. This keeps Mail.com and Google+ spam away from your main email accounts.

Step Five in Accessing Mail.com and creating an account.
Step Five

   Now it's time to enter in an email address and select a domain from the dropdown menu. You will then need a password that is at least 8 characters in length. Next, leave out the contact email so you can avoid spam. Now you need to select your security question from the drop down menu and then provide an answer you can remember at a future date.

Step Six in Accessing Mail.com and creating an account.
Step Six

   We are almost done. You just need to fill out the security question by entering in the code you see in the graphics above the query. Before you accept and create the account I strongly recommend that you save the information you entered for future reference. We have provided a form for this which you are free to use, if you wish.


    When you are finished saving your log-in information, click on the 'Create my Account' button. This will create your email account and then direct you to your account welcome page.

Step seven in verifying and using your Mail.com account.
Step Seven

   The one-time welcome page will display your email address, your account number, security question and date of birth. Again, take note of the email address because you will need it when you log on again. Select the green 'continue to inbox' button to enter your email accounts main page. Have a look around and then select the top left, log out icon to log out of mail.com. You now can close your browser and move on to step 8.

Video Tutorial (Step 1 thru 7): 'Accessing Mail.com and creating an account'

Phase One Video : Accessing Mail.com and creating an account.
Phase One Video

             Project One Phase 1 email from Shaw Website Design Group on Vimeo.

                          Tutorial Video Covers Steps (1 thru 7)

Phase Two : Verifying and using your Mail.com account.

Second Phase : Verifying and using your Mail.com account
Verifying and using your Mail.com account

Need to see the Illustration's legend?

Step eight verifying and using your Mail.com account.
Step Eight

   Open your web browser and bring up the search engine you use last time. Find mail.com and select the hyperlink provided by the search to access their webpage. Depending on the page presented you either will have a email and password login box at the top right or a log-in button by itself. If you see that button by itself, press it so you can move on to the login page.

Step Nine in verifying and using your Mail.com account.
Step Nine

   Enter in your email address and password and hit the login button. If all goes well you should log back in to your email account page that we covered in step 7. Take note that you will be faced with a pop-up screen every time you log on. This is due to the fact that you are using this service for free. Close the pop-up and begin looking around.

Step Ten in verifying and using your Mail.com account.
Step Ten

  Now that we know that the email address is active and the password works we should begin exploring around to get our bearings. Find and select the Email tab that is located either on the left sidebar or horizontal tab menu. You will then be presented with a list of your current inbox mail messages. If you want to read an email, double click on the summary provided to expand the emails presentation.

Step Eleven in verifying and using your Mail.com account.
Step Eleven

  We now are going to learn how to delete email messages. Select the one and only message that is in your inbox folder and note that the checkbox selector is now marked.  You will be presented with a list of options ranging from replying to the email to moving the email to another folder. With the checkbox still checked, select delete to move the introductory message to the trash.

Step Twelve in verifying and using your Mail.com account.
Step Twelve

  You will be needing this email address for the time-being to communicate with Google, but, if in the future you want to delete this email account, here are the required steps.


  First you will need to find and select the Settings menu option which is represented by a wrench icon located on the top right of your mail.com web page.

Step Thirteen in verifying and using your Mail.com account.
Step Thirteen

  The settings popup will now open and provide you with a graphical list of options at the top. Select the 'my account' icon, represented by the yellow mailbox icon, on the top menu. This will provide you with a page where you can change your personal email information. Now choose from the side menu, 'Account Details' and then scroll down to the bottom of the page where you will see the delete account option.

Step Fourteen in verifying and using your Mail.com account.
Step Fourteen

  When you select the 'delete your account now' hyperlink, a pop up will appear asking you for your email password, a reason for the deletion and optional feedback. When you press the delete account button after filling out the form you will be warned with one last pop up and if you agree...the email account will be deleted.

Video (Step 8 thru 14): 'Verifying and using your Mail.com account'.

Phase Two Video : Accessing Mail.com and creating an account.
Phase Two Video

            Project One Phase 2 email from tim shaw on Vimeo.

                          Tutorial Video Covers Steps (8 thru 14)

Conclusion of Tutorial Project : 'Creating a Generic Email Account'

     This ends the first tutorial, focusing on creating a Mail.com account. You now have a generic email account that is free to use and is not attached to your existing email address. 


     In Part Two of the series “Jimdo images will love google+”, we will sign up with Google+ and use our newly creating Mail.com account to verify our Google+ status. We then will go through a quick tour of Google+, focusing on the tools we will need to share our photos and images with the world. Before you know it, we will have properly tagged and saved images to the Google Cloud for our Jimdo webpage to use.


     Thanks you for you interest and stay tuned....


Part 2 : Creating your Google+ Account is in progress..

Helpful Resources:

The Illustration Legend: Creating a Generic Email Account

a legend representing the graphic symbols on the tutorial pages.
Illustration Symbol's
  • Upload: You will upload a file
  • Download: You will download a file
  • Internet: You will be using a web browser to complete a task.
  • Tool: You will be using a tool or plugin to complete a task
  • Paint: You will be working with Microsoft paint to complete a task.
  • Email: You will access an email account to complete a task.
  • Step: Part of the step by step process beginning with 1 on each tutorial page.
  • Time: The time it should take to complete the tutorial page.

Return to:  Phase One, Phase Two.

Download Information : Creating a Generic Email Account

eForms : Project One PDF files
eForm (pdf) : Project One

Here is a form to help you with the creation of your Mail.com account :
Download pdf


Simply save the PDF file to a directory of your choice and then open up the saved file with a PDF Reader. You can then fill out the form and save the information for future reference. If you are in need of a PDF reader, Adobe provides one for free and it can be downloaded here: Adobe Reader XI

Return to the end of Phase One

Shaw Website Design Group - Floating your curiosity and helping your

learning Experience with Jimdo CMS...one bubble at a time.